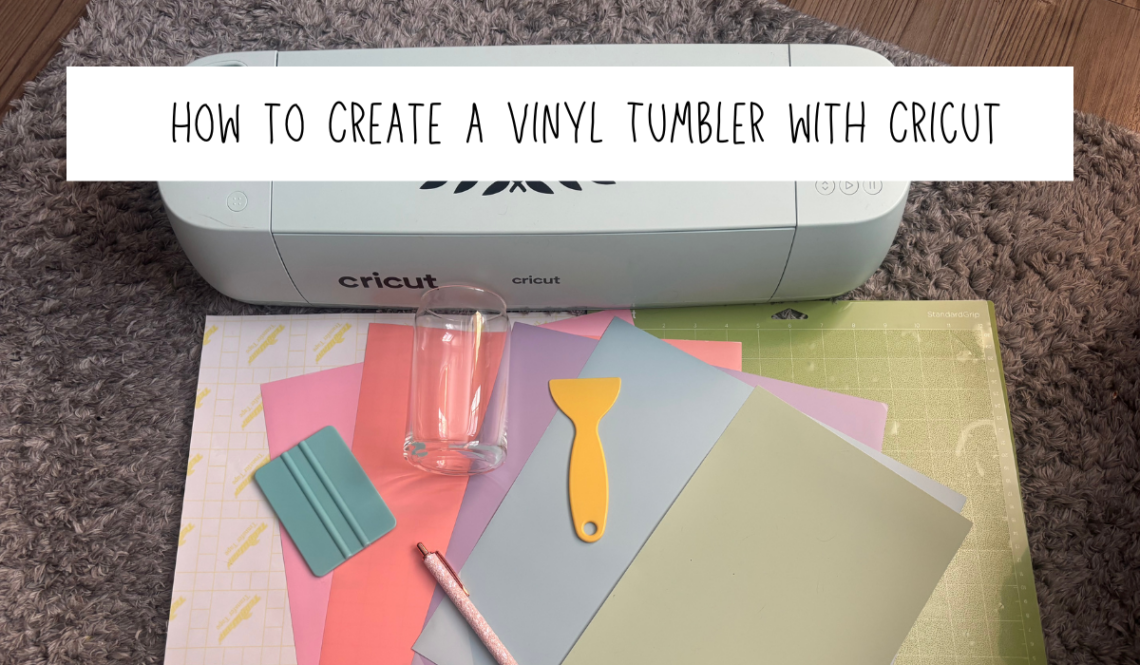
One of the most common projects made with Cricut are the Libby Glass Vinyl Tumblers with vinyl wraps on them. Today, I am going to be laying out the steps on how to make Libby Glass Tumblers with Cricut! If you want to see a quick TikTok video of me making this Glass I will link the video in this post!
Step 1: Gather Materials
For this project you will need:
- a Cricut
- Cricut Vinyl of your choosing
- Laptop
- Scissors/Vinyl cutter
- Squeegee
- Weeding tool
- Transfer Paper
- Libby Glass
Step 2: Design your wrap through Cricut Design Space
The first step within this is create a guide:
- Add a rectangle shape to your grid

2. Click where it says operation and change it from Basic Cut to Guide

3. Next you will want to change the size of your guide to match the height and circumference of the glass. For a 16 ounce libby the height is 5.25 inches and the diameter is 9.4 inches

Now you are ready to create your design!
Step 3: Creating your Design
This is completely up to you on the design but I will insert a picture of the design I chose to do!

Step 4: Cutting your Design
- Press the Make Button in the top right corner of your screen

2. If you are using any other vinyl than Cricut Smart Vinyl than you will have to hit “On Mat”

3. Next make sure everything is set up to cut properly. Design Space will show exactly how it will be cut on your vinyl in real time. It will also have it set up for each color of vinyl you use.
4. Next hit Continue. You will then select what type of material you are using. I always select permanent vinyl
5. Next, follow the steps on screen to get your vinyl cut!
5. Applying Vinyl to Glass
- After cutting, I always make sure to trim away any excess vinyl that can be used for another project. vinyl can be expensive so I like to save as much as I can 🙂
- Using your weeding tool, remove any excess vinyl that does not go on the glass.
- This includes the middle of letters, the outside edge of your design. Anything that is not part of the design can get removed here
- Taking your transfer paper, stick it on top of one of the pieces of vinyl.
- Take your squeegee and put force so the transfer paper will pick it up
- Peel back and make sure your vinyl is stuck and fully peel it off the backing
- Press it on the glass where you want it to go
- Use the squeegee again to push it onto the glass
- Remove the transfer paper
- Continue to do this until all of the vinyl is on your glass
And that’s it!
Hopefully this helped in how to make a vinyl cup with Cricut. If you want to see how I made the Easter cup, the video is linked up above!