When it comes to making a delicious cup of coffee, steaming milk properly is just as important as brewing the perfect espresso. Whether you’re crafting a rich cappuccino or a smooth latte, milk texture plays a huge role in the final result. And, of course, once you’ve mastered the steaming process, you can take it a step further by creating stunning latte art that will impress even the most discerning coffee lover. Here’s a guide to help you steam milk like a pro and learn the basics of latte art.
1. Steaming Milk: The Basics
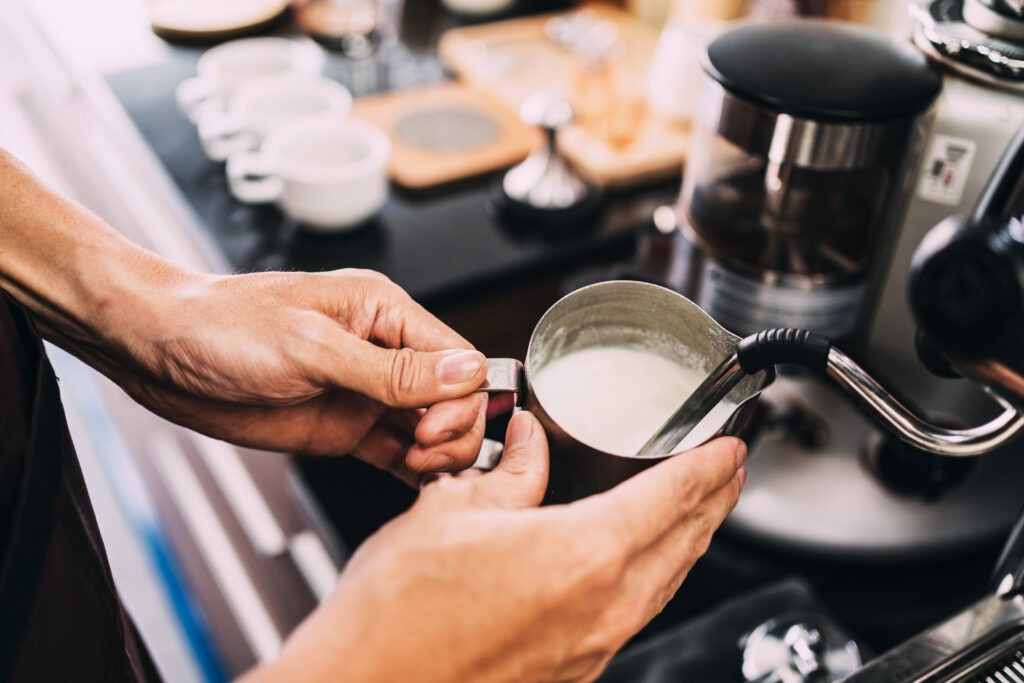
Before you start pouring beautiful designs in your latte, you need to perfect the art of steaming milk. Here’s how you can get the perfect texture for your milk, whether you’re using a traditional espresso machine or a milk frother.
Choose the Right Milk
The type of milk you use can affect the texture and taste of your drink. Whole milk is the go-to choice for many baristas, as its fat content creates a smooth, creamy texture that’s ideal for lattes and cappuccinos. If you’re looking for a dairy-free alternative, oat milk is one of the best choices for steaming, as it froths well and has a similar creamy texture to whole milk. Almond milk, on the other hand, can be trickier to steam, often resulting in less creamy microfoam. Coconut milk, as well, is hard to steam it’s easy to burn it and leave people with a burnt taste.
Steam to the Right Temperature
Milk should be steamed to a temperature between 150°F and 155°F (65°C to 68°C). Any hotter, and you risk scalding the milk, which will create a burnt taste and ruin the texture. Use a thermometer for precision, especially if you’re just starting out.
If you don’t have a thermometer, a simple test is to touch the side of the milk frothing jug — when it feels warm but not too hot, you’re in the right range. Once the jug gets too hot to touch comfortably, you’re likely over the ideal temperature.
Achieve Microfoam
The key to perfect steamed milk is microfoam: smooth, velvety milk with tiny, fine bubbles that make your coffee rich and creamy. To create microfoam, you need to incorporate air into the milk at the right time.
Here’s how:
- Submerge the steam wand: Place the steam wand just below the surface of the milk and turn it on. As it draws in air, you’ll hear a gentle “hissing” sound. If you hear a loud, harsh sound, you’re introducing too much air.
- Angle the jug: Tilt the milk jug slightly to create a whirlpool effect, which helps break down any larger bubbles and create a silky texture.
- Steam in stages: For the first few seconds, let the steam wand introduce air. Once the milk starts to expand (you’ll see it rise), submerge the wand deeper into the milk to finish heating. The swirling action helps create a smooth, even texture.
The goal is to end up with a glossy, smooth, and velvety foam, not big, bubbly froth. Practice makes perfect, but once you get the hang of it, it’ll feel like second nature. If you are a visual learner like me this is a really good YouTube video to go off of.
Sure! Here’s a blog post that covers how to steam milk properly and some tips on getting started with latte art:
Title: The Art of Steaming Milk & Creating Beautiful Latte Art
When it comes to making a delicious cup of coffee, steaming milk properly is just as important as brewing the perfect espresso. Whether you’re crafting a rich cappuccino or a smooth latte, milk texture plays a huge role in the final result. And, of course, once you’ve mastered the steaming process, you can take it a step further by creating stunning latte art that will impress even the most discerning coffee lover. Here’s a guide to help you steam milk like a pro and learn the basics of latte art.
1. Steaming Milk: The Basics
Before you start pouring beautiful designs in your latte, you need to perfect the art of steaming milk. Here’s how you can get the perfect texture for your milk, whether you’re using a traditional espresso machine or a milk frother.
Choose the Right Milk
The type of milk you use can affect the texture and taste of your drink. Whole milk is the go-to choice for many baristas, as its fat content creates a smooth, creamy texture that’s ideal for lattes and cappuccinos. If you’re looking for a dairy-free alternative, oat milk is one of the best choices for steaming, as it froths well and has a similar creamy texture to whole milk. Almond milk, on the other hand, can be trickier to steam, often resulting in less creamy microfoam.
Steam to the Right Temperature
Milk should be steamed to a temperature between 150°F and 155°F (65°C to 68°C). Any hotter, and you risk scalding the milk, which will create a burnt taste and ruin the texture. Use a thermometer for precision, especially if you’re just starting out.
If you don’t have a thermometer, a simple test is to touch the side of the milk frothing jug — when it feels warm but not too hot, you’re in the right range. Once the jug gets too hot to touch comfortably, you’re likely over the ideal temperature.
Achieve Microfoam
The key to perfect steamed milk is microfoam: smooth, velvety milk with tiny, fine bubbles that make your coffee rich and creamy. To create microfoam, you need to incorporate air into the milk at the right time.
Here’s how:
- Submerge the steam wand: Place the steam wand just below the surface of the milk and turn it on. As it draws in air, you’ll hear a gentle “hissing” sound. If you hear a loud, harsh sound, you’re introducing too much air.
- Angle the jug: Tilt the milk jug slightly to create a whirlpool effect, which helps break down any larger bubbles and create a silky texture.
- Steam in stages: For the first few seconds, let the steam wand introduce air. Once the milk starts to expand (you’ll see it rise), submerge the wand deeper into the milk to finish heating. The swirling action helps create a smooth, even texture.
The goal is to end up with a glossy, smooth, and velvety foam, not big, bubbly froth. Practice makes perfect, but once you get the hang of it, it’ll feel like second nature.

2. Introduction to Latte Art
Now that you’ve steamed your milk to perfection, it’s time to get creative. Latte art is all about pouring steamed milk over espresso in a way that creates beautiful, intricate patterns. Don’t be intimidated — anyone can learn the basics with a little practice.
Step-by-Step Guide to Pouring Latte Art
- Brew a Solid Espresso
Start with a good espresso shot. A rich, well-pulled shot with good crema is essential for creating great latte art. The crema is the golden, foamy layer on top of the espresso, and it provides a beautiful canvas for your latte art design. - Swirl the Milk
After steaming your milk, give your jug a gentle swirl to mix the foam and milk. This helps eliminate any large air bubbles and ensures the microfoam is smooth and ready to pour. - Pour the Milk
To create the classic heart or rosette design, start pouring the milk slowly from about an inch above the cup. As the milk starts to settle into the espresso, lower the jug closer to the surface, and begin to pour more quickly. - Create Your Design
- For a heart, as you pour, gently wiggle the jug back and forth and then finish by pouring into the center to form the tip of the heart.
- For a rosette, use a similar technique but move the jug back and forth in a sweeping motion before finishing in the center.
- Practice Makes Perfect
Latte art takes practice, so don’t be discouraged if your first attempts don’t turn out perfectly. Keep experimenting with different pouring speeds and angles to refine your technique. Even if you don’t get a perfect design every time, your drinks will still taste amazing!

3. Common Latte Art Designs to Try
Once you’ve mastered the basic heart, you can try your hand at more complex designs. Here are some ideas:
- Heart: The classic and easiest design. Perfect for beginners.
- Rosette: A fern-like pattern with a sweeping motion.
- Tulip: A series of small hearts layered on top of each other, forming a tulip shape.
- Swan: A more advanced design that takes some practice but looks stunning once you’ve mastered it.
Final Thoughts: Practice, Patience, and Passion
Steaming milk and creating latte art is an art form that takes time to master. It’s all about practice, patience, and having fun with the process. Whether you’re a beginner or looking to improve your skills, focus on perfecting your technique one step at a time. And remember — a beautifully poured cup of coffee is as much about enjoying the process as it is about the final result.
So, grab your favorite espresso beans, steam some milk, and start pouring. The world of latte art is waiting for you to dive in!